
The parts of Sealshot
Sealshot has five places you’ll spend time, and one file format that ties them together. This page is the map; the guide covers each part in depth.
The menu bar is the launcher
Section titled “The menu bar is the launcher”Click the Sealshot icon in your menu bar to start any capture or recording, open the editor or Library, or reach Settings — and every command shows its keyboard shortcut right in the menu, so a capture is one keystroke away from whatever app you’re in.
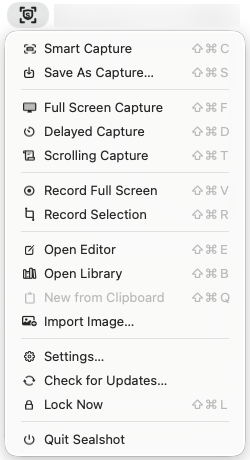 Start captures and open the editor from the menu bar.
The capture overlay
Section titled “The capture overlay”Press a capture shortcut and Sealshot takes over the screen — frozen, so menus and hover states hold still while you aim.
- Hover and it highlights the region under your cursor; scroll steps through the regions containing your pointer
- Drag for an exact area
- Hold ⌘ while dragging (or ⌘-click) to keep the selection adjustable — resize handles, a draggable interior, and a typed size — until you press Return
- Esc cancels, always
The same overlay serves area, window, delayed, and scrolling capture. See Capture modes.
One window, three tabs
Section titled “One window, three tabs”This is the thing newcomers miss: Editor, Library, and Settings are three tabs of the same window, switched from the control at its top left. Captures open on the Editor tab; the Library is where they all live; Settings is right there rather than in a separate window.
Inside the editor
Section titled “Inside the editor”| Where | What |
|---|---|
| Center | the canvas — your capture |
| Left of the toolbar | drawing tools — select, hand, crop, pen, line, arrow, shapes, text, step, blur |
| Right of the toolbar | on-device AI actions — Smart Redact, Extract Data, Enhance, Remove Background — plus Find in Image |
| Above the canvas | the zoom cluster — slider, exact percentage, Fit / Fit width / Fit height / Actual size |
| Right sidebar | the Info panel — name, dimensions, summary, Smart Keywords, your tags, favorite star |
| Bottom | the recent strip — your latest captures, one click away |
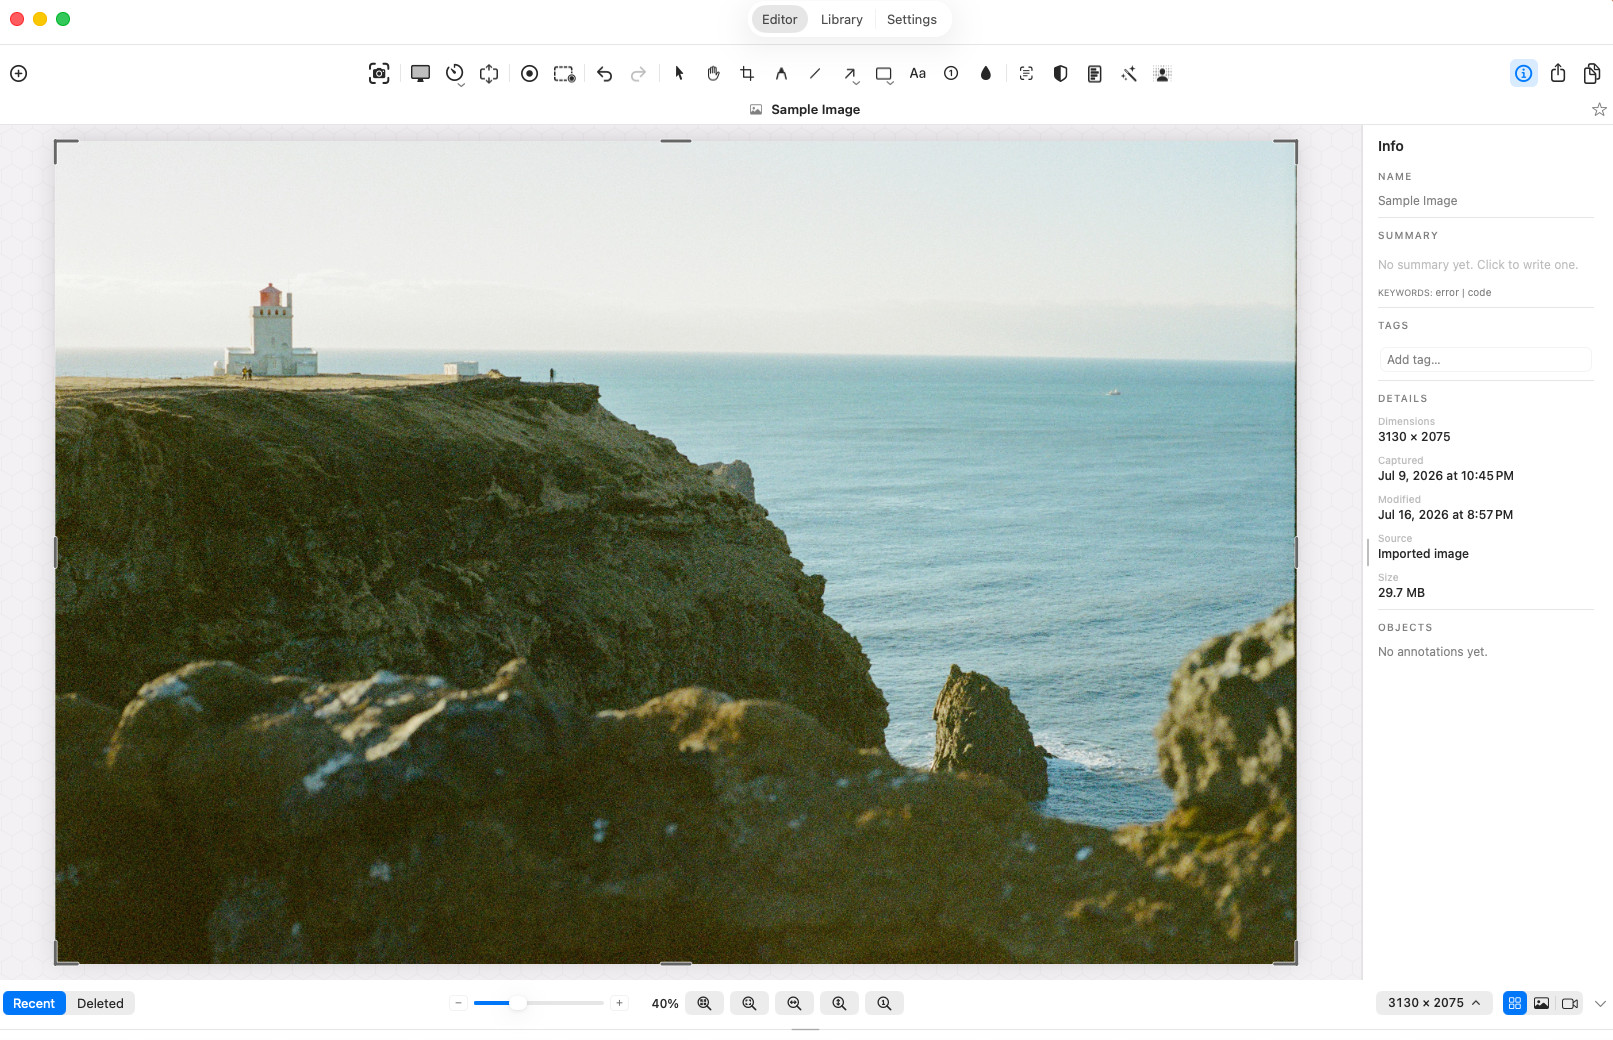 The editor: toolbar, canvas, Info panel, and the recent-captures strip.
Inside the Library
Section titled “Inside the Library”The sidebar holds All Files, Recents (last 7 days), your Collections with Favorites pinned on top, and Trash — plus filters by tag, by date, and by media type. Press Space on any capture for a preview without opening the editor, and switch between grid and list views to taste. See Library & search.
The thing worth knowing early: search reads the text inside your images, so a capture is findable without ever being named or filed.
Inside Settings
Section titled “Inside Settings”Nine sections down the left — General, Capture, Recording, On-Device AI, Shortcuts, Permissions, License, Privacy & Security, and About. Three are worth a minute on day one:
- Capture → Default destination — Clipboard, File, or Both
- General → Save location — where captures land
- Shortcuts — rebind anything that clashes with another app
Most sections have a Reset for their own options, and General adds a Reset All. See Settings.
What a capture actually is
Section titled “What a capture actually is”Every capture is a .seal package: the
original untouched pixels, your annotations as live objects, the recognized
OCR text, the generated summary and keywords, and any cached extraction
results — together in one file.
That’s why annotations stay editable indefinitely. When a button moves next
release, you reopen the .seal, drag the arrow, and re-export — rather than
re-taking the screenshot. Exports (PNG, MP4, or an encrypted package) are
flattened copies; the .seal original stays intact.
Optional: the lock
Section titled “Optional: the lock”Turn on Enhanced Security and everything Sealshot stores is encrypted at rest — images, recordings, the search index, undo history, and OCR text — with viewing behind Touch ID.
Capturing keeps working while the library is locked, so the protection never costs you a shot.
Next: your first capture.